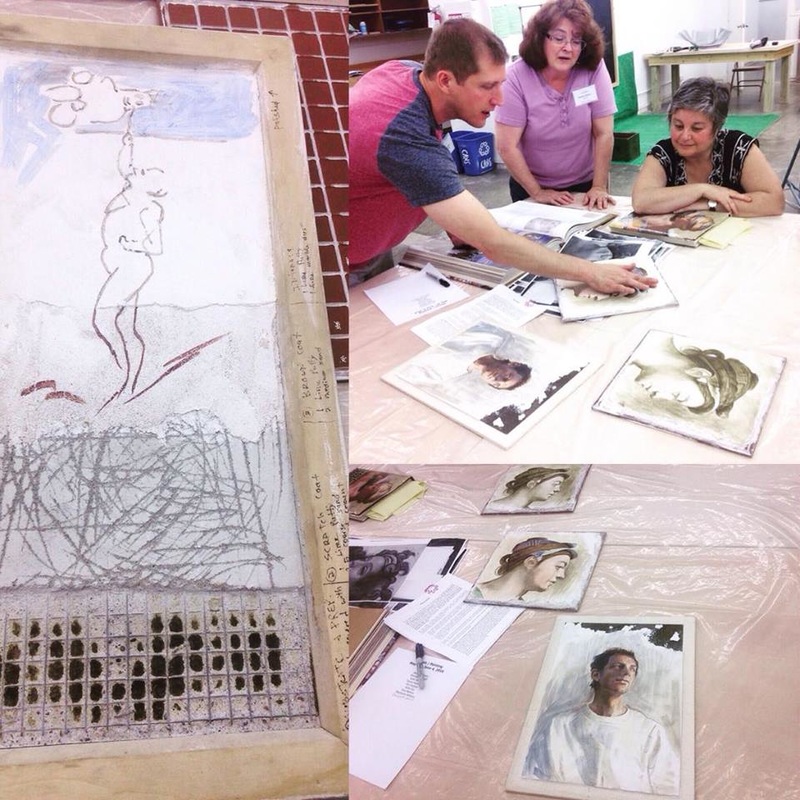
 My buon fresco class has finally begun! I have already learned a great deal about this difficult and historical technique…Buon fresco takes patience, practice, and great skill. While I am still learning the basics of this historical art form, I wanted to share some of the resources available to those interested in it. I am taking the workshop with the talented Michael Nichols who spoke of the fresco community as a small one, though it seems he has done a fantastic job creating the beginnings of a fresco network through his blog Buon Fresco 101. Within this site you will find information about the artists working with buon fresco, resources, information about materials, as well as the history of Buon Fresco. In the workshop we will be learning the traditional technique of buon fresco used by Diego Rivera for the many historical and breathtaking frescos he created across the world. I was excited to hear this and see Nichols refer to many of his murals, some I have seen while living in Mexico! Nichols explained that the technique of Buon Fresco can be very traditional and rigid in a sense, though there are modern and contemporary artists out there doing new and interesting things with it. During the beginning of the workshop while Nichols explained the process of creating the plaster tile/structure for buon fresco I immediately began to construct ideas of how this could be applied to my own work…especially my ceramics. Can I create my own armature to then fresco onto, creating a 3 dimensional fresco? YES! Barbara Sullivan is an artist Nichols referred me to. Can I create pieces that are part ceramic (glazed) and part fresco? I think so!! I am learning that the most important part of applying the plaster is that the surface have tooth/texture. There is also an artist that Nichols explained has explored sealing the fresco he painted in a bowl and filling it with water! I have a lot of ideas and it will take time and experimentation to see what I can accomplish. For this first blog I would like to share the beginning stage of my sketches I have created for the course. Later I will write about the process we used to create our own plaster for fresco. Nichols will be teaching us the simple way of applying the plaster to the back of ceramic tiles, as well as the larger version and stronger support of creating our own frame and structure to then apply the plaster in multiple layers. The images below show my beginning drawings that must remain simple black and white for the moment. It is important that the different values are easy to identify. 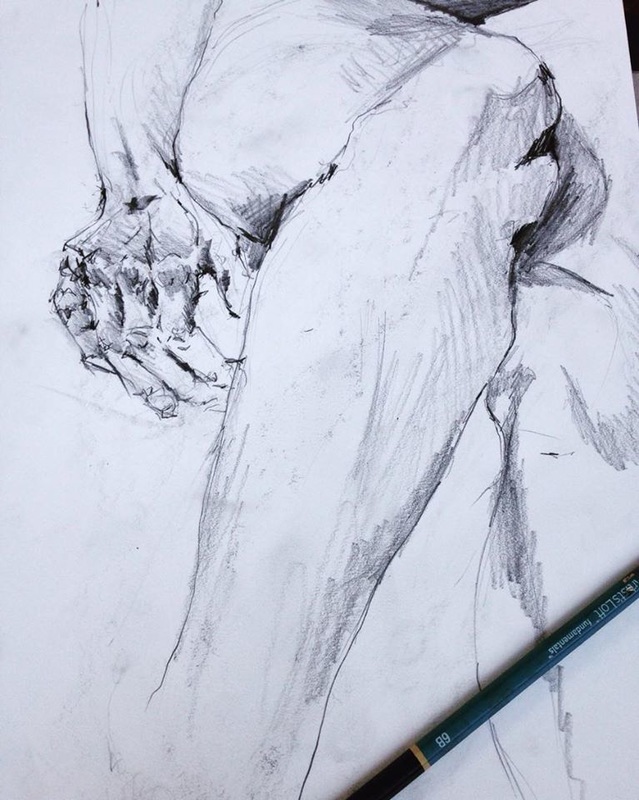 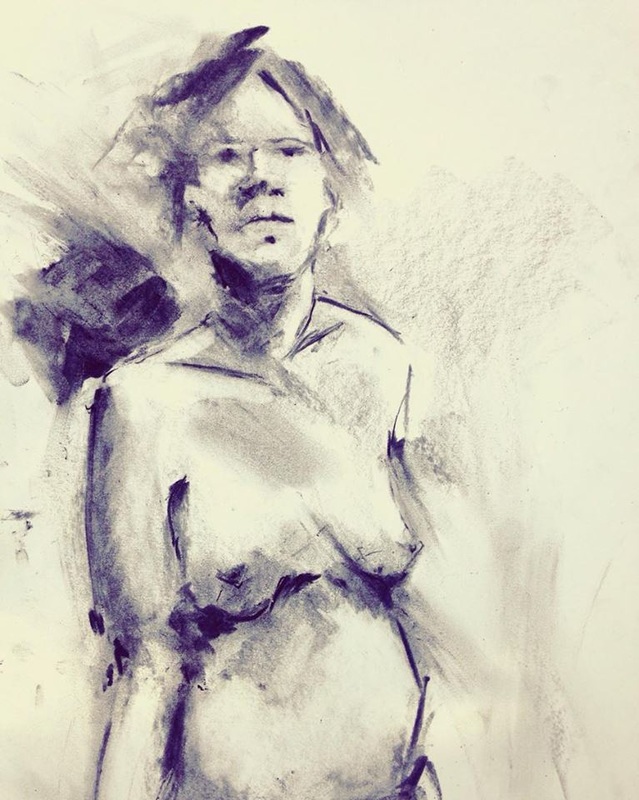 These images show the process of tracing these on to tracing paper to later be transferred onto the fresco surface. You can see the subtle indentation of the image on the painting layer and I had begun painting the "verdaccio" which is the underpainting usually done in a yellow greenish color. Diego Rivera used a black verdaccio for his frescos. 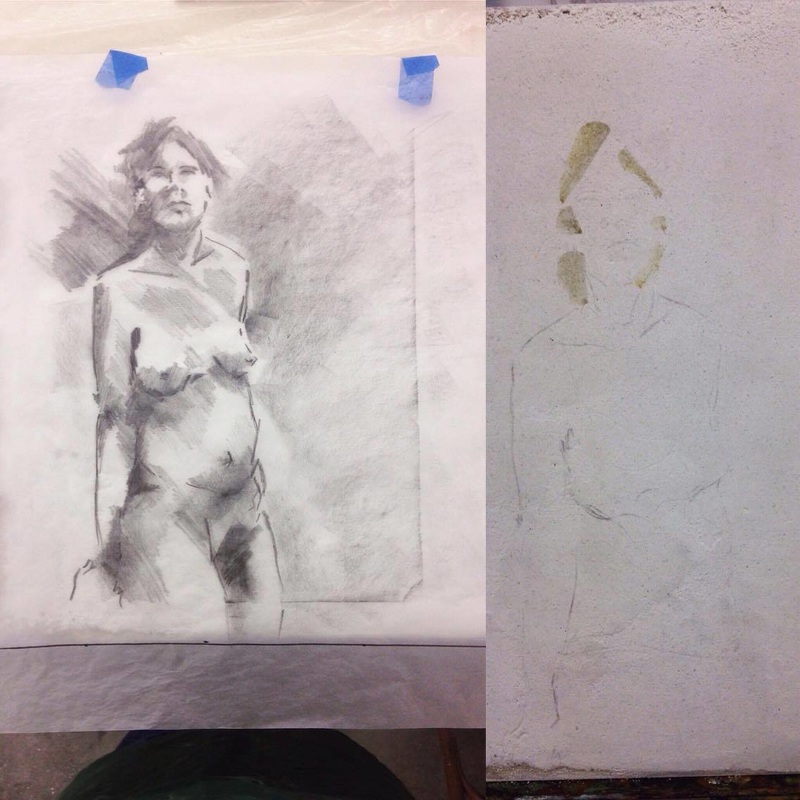 Michelangelo used the technique we will try which is pushing pin holes into the drawing to then pound gently a charcoal powder…leaving the charcoal line on the fresco surface. This is called “spolvero” or “pouncing.” 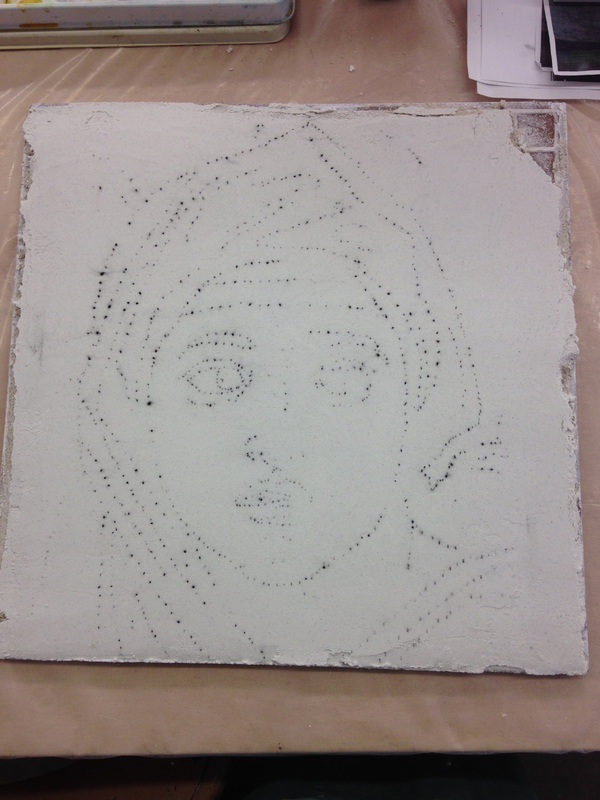
Pamo Parziale
12/8/2016 06:50:11 pm
Stephanie, This is such a good story well told and so full of information. It is wonderful to be able to follow your evolution as an artist. Thank you for making this available. It only enhances my appreciation for your artwork. In admiration, pamo
Stephanie
12/8/2016 08:03:50 pm
Thank you so much Pam!!! So happy you enjoyed the information and that it was helpful to explain the process =] Thank you for your support!! Comments are closed.
|
Hi I'm Stephanie! On my blog you can read about my research, process, techniques, and other ideas and inspirations. Feel free to contact me with any questions or comments!
Categories
All
|
 RSS Feed