|
Buon fresco is a very labor intensive art form…and in many ways is very similar to ceramics. That being said, it was the perfect workshop for me to take this summer, especially in preparation for the fall. While there is so much information and process involved, I will try my best to summarize what it is that I learned. If you would like more detailed information you can visit the website, created by my instructor Michael Nichols, buonfresco101. In the workshop we created two types of frescos. One on a large wall structure and the others on small ceramic tiles. There is a cement mixture that is referred as the “scratch coat,” which is only really needed for large structured frescos and is lime, sand, and cement. The main key for fresco is that the plaster has something textured and absorbent to hold on to. The second layer applied is called the “brown layer” which consists of sand and lime. The final layer on a fresco is the “painting coat.” This is lime and very fine sand or instead of lime you can use marble dust which gives a whiter and almost sparkling surface. The amount of water used in your fresco layers determines the amount of time you have before curing begins. When the surface cures a chemical reaction occurs creating crystals on the surface of your fresco which seals the pigment into the plaster! The images you see below are a compilation of the steps we took in creating the large wall fresco. Michael taught us this specifically to experience joining two sections of fresco. "Giornata" is a term, originating from an Italian word which means "a day's work." This describes the daily segments of the painting. 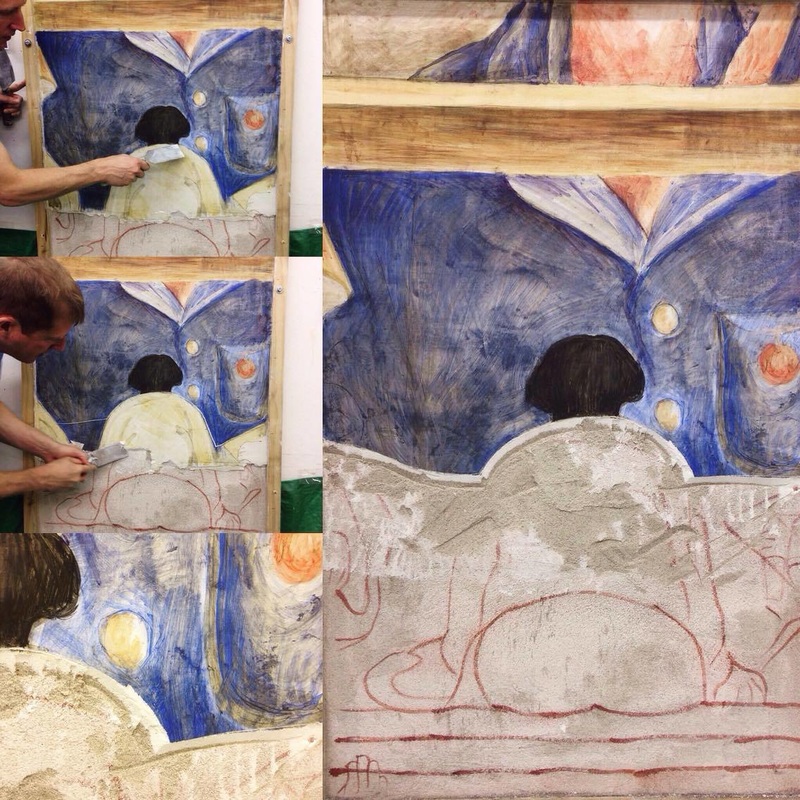 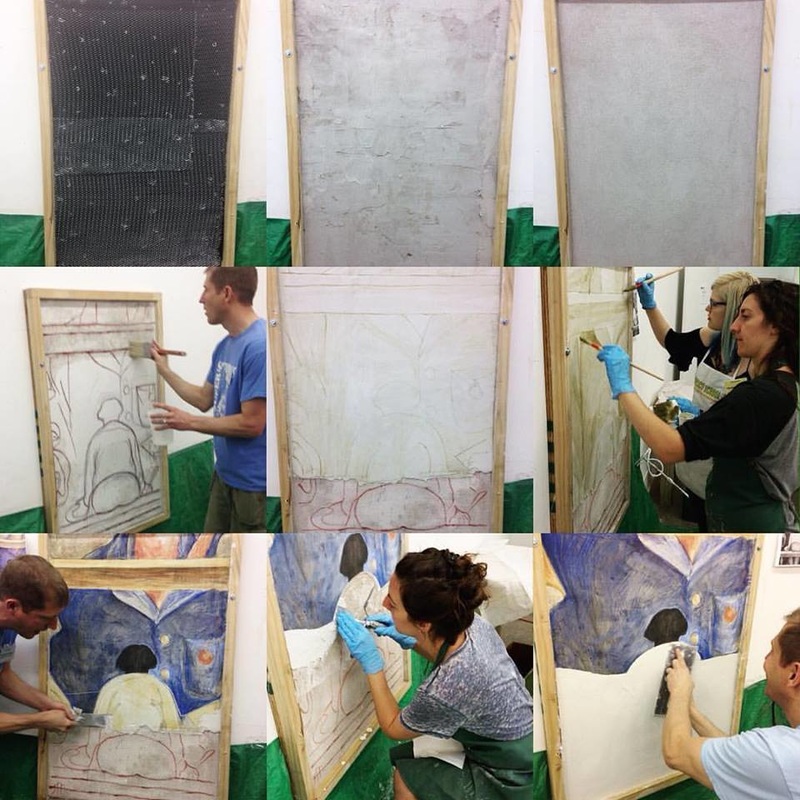 For your small ceramic tiles the “brown layer” is not necessary but it is important to polish the surface carefully. I struggled with timing this properly and unfortunately there were certain areas of my fresco that did not take the pigment. 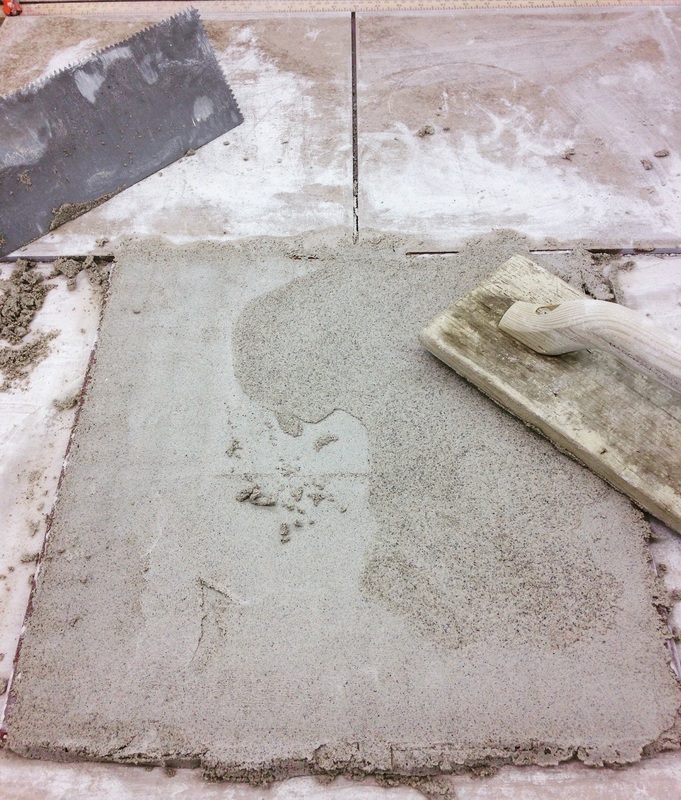 The next step in creating your fresco is the image transfer which I spoke about a bit in my previous post. You can apply your image through “pouncing” with charcoal dust or you may use tracing paper and apply pressure with a rounded point. Both of these techniques will effectively leave a tracing of your image…it’s just a matter of which you prefer.   Painting buon fresco is all about timing and knowing when the surface is ready for the next step. The layers must be absorbent and be able to immediately take the pigment into its surface. You will be able to know when you are ready to paint if the water in your brush is absorbed. You will paint your image with a subtle “verdaccio” or underpainting in order to have an idea of the values as you paint. Remember that you only have maybe a 5 hour window of time to paint before your fresco cures! When painting you must use pigments mixed with distilled water only. Regular water should be avoided when painting fresco and the milk from your lime can be used to create opaque layers. The beauty of fresco is the amount of layers painted through time to create colors and tones. We practiced a great deal painting indirectly…meaning creating an area of green by applying transparent layers of yellow and blue over one another. You must NEVER paint over the same area twice and too soon. The fresco needs time to absorb the color, and painting too quickly and too often can damage the crystals on the surface and the absorbency of your fresco.  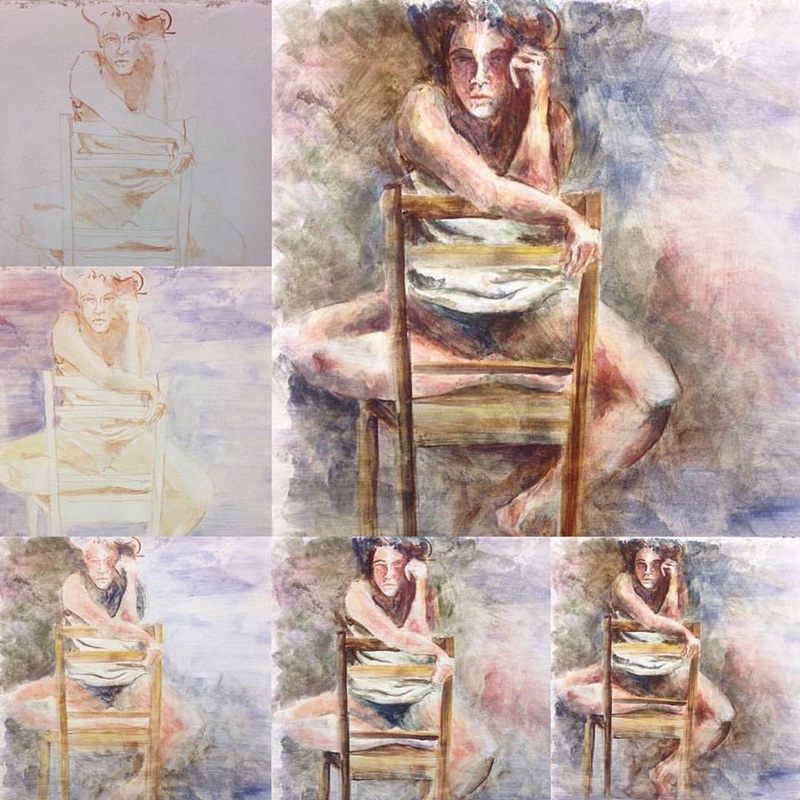 Once you have finished painting your fresco you must allow it to cure for atleast two days before attempting to wash it under water. If painted correctly and like a true buon fresco, the pigment will not move during the rinsing. It is not necessary to wash your fresco, but is an exciting experience! Some fresco artists will finish their piece with a wax layer (but only if you have not rinsed your fresco) which helps to create a smoother finished surface.  This was a very simplified write up of the basic steps necessary to create a buon fresco...there are so many more details and processes involved. We created the majority of our own materials which also helped immensely with cost. 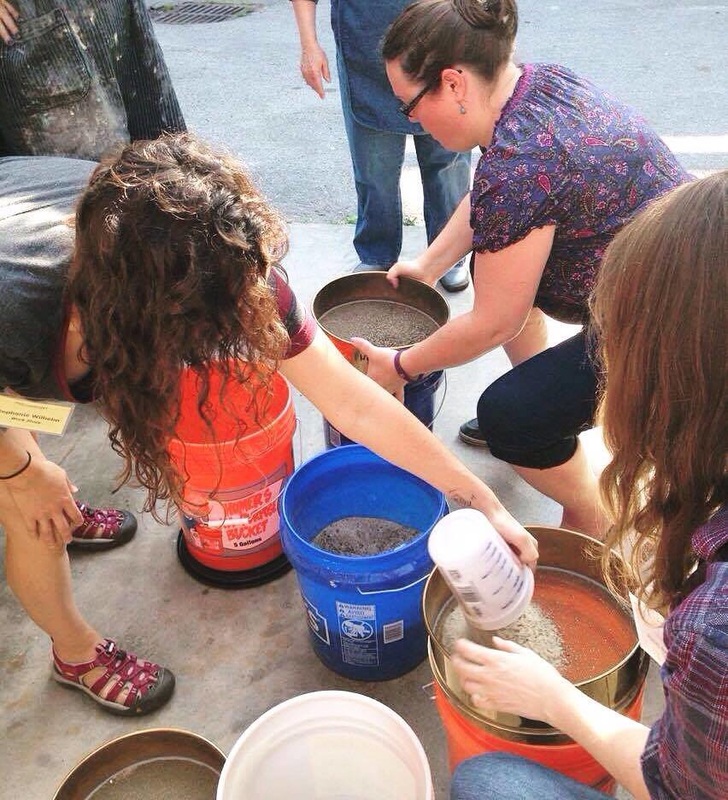 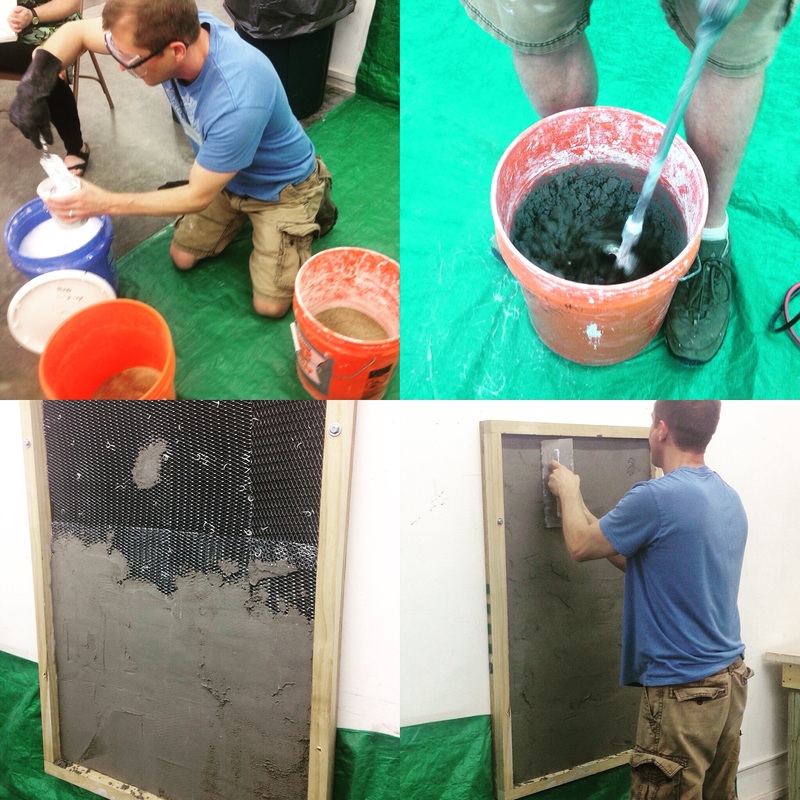  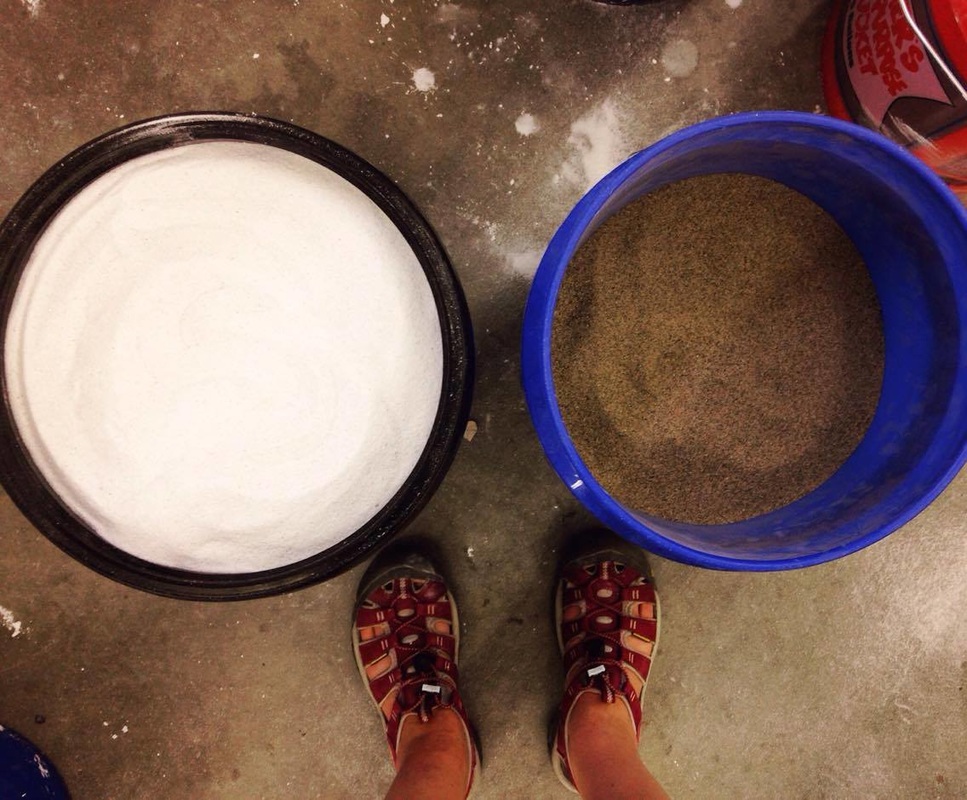 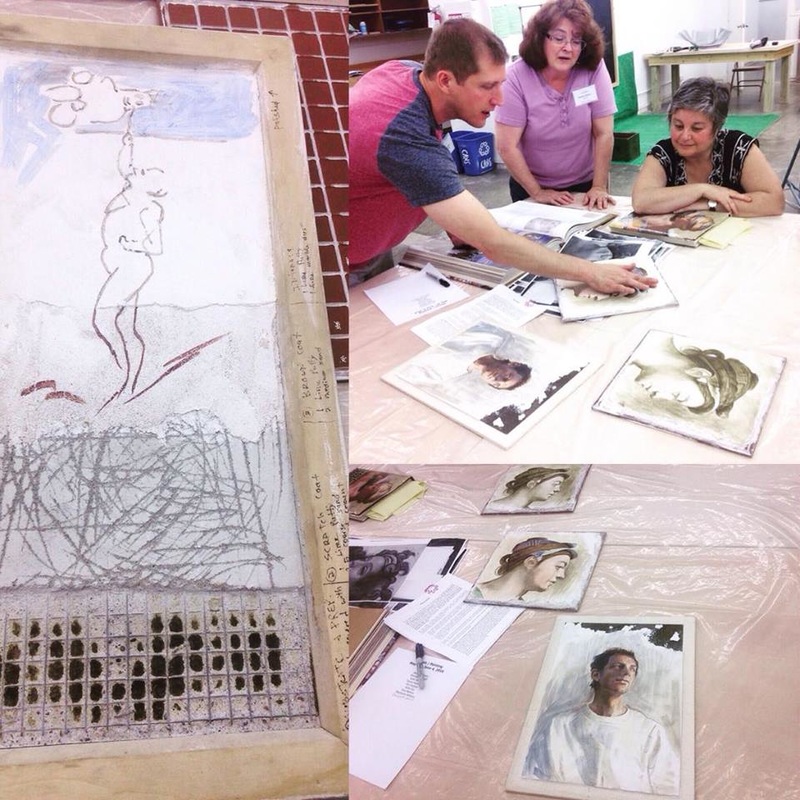 My buon fresco class has finally begun! I have already learned a great deal about this difficult and historical technique…Buon fresco takes patience, practice, and great skill. While I am still learning the basics of this historical art form, I wanted to share some of the resources available to those interested in it. I am taking the workshop with the talented Michael Nichols who spoke of the fresco community as a small one, though it seems he has done a fantastic job creating the beginnings of a fresco network through his blog Buon Fresco 101. Within this site you will find information about the artists working with buon fresco, resources, information about materials, as well as the history of Buon Fresco. In the workshop we will be learning the traditional technique of buon fresco used by Diego Rivera for the many historical and breathtaking frescos he created across the world. I was excited to hear this and see Nichols refer to many of his murals, some I have seen while living in Mexico! Nichols explained that the technique of Buon Fresco can be very traditional and rigid in a sense, though there are modern and contemporary artists out there doing new and interesting things with it. During the beginning of the workshop while Nichols explained the process of creating the plaster tile/structure for buon fresco I immediately began to construct ideas of how this could be applied to my own work…especially my ceramics. Can I create my own armature to then fresco onto, creating a 3 dimensional fresco? YES! Barbara Sullivan is an artist Nichols referred me to. Can I create pieces that are part ceramic (glazed) and part fresco? I think so!! I am learning that the most important part of applying the plaster is that the surface have tooth/texture. There is also an artist that Nichols explained has explored sealing the fresco he painted in a bowl and filling it with water! I have a lot of ideas and it will take time and experimentation to see what I can accomplish. For this first blog I would like to share the beginning stage of my sketches I have created for the course. Later I will write about the process we used to create our own plaster for fresco. Nichols will be teaching us the simple way of applying the plaster to the back of ceramic tiles, as well as the larger version and stronger support of creating our own frame and structure to then apply the plaster in multiple layers. The images below show my beginning drawings that must remain simple black and white for the moment. It is important that the different values are easy to identify. 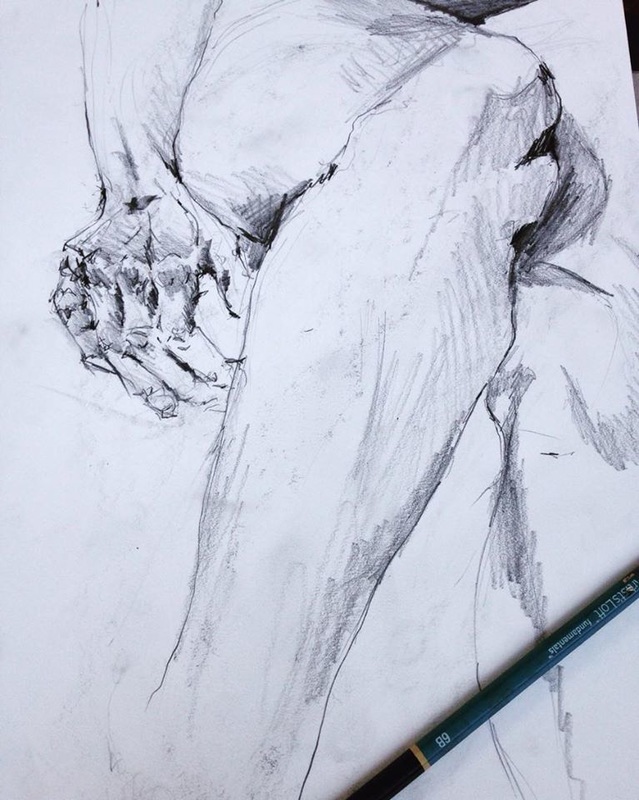 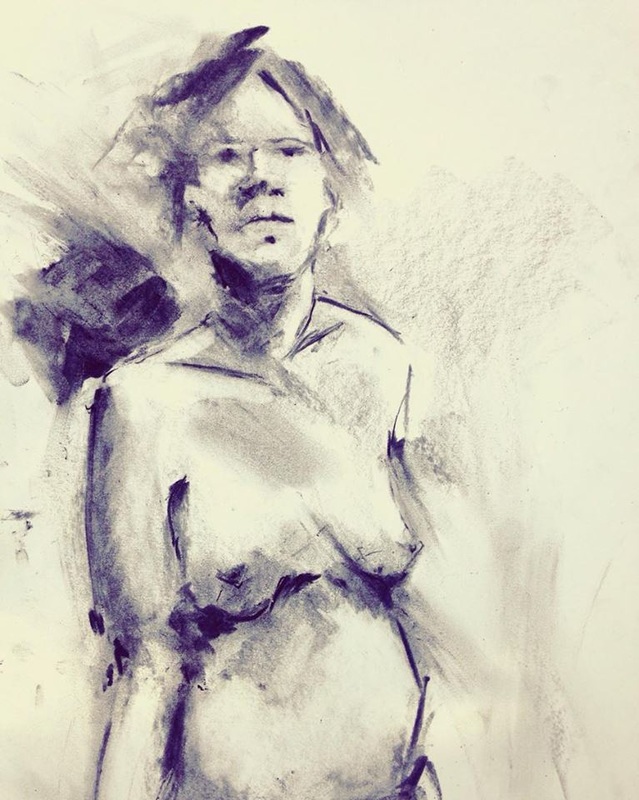 These images show the process of tracing these on to tracing paper to later be transferred onto the fresco surface. You can see the subtle indentation of the image on the painting layer and I had begun painting the "verdaccio" which is the underpainting usually done in a yellow greenish color. Diego Rivera used a black verdaccio for his frescos. 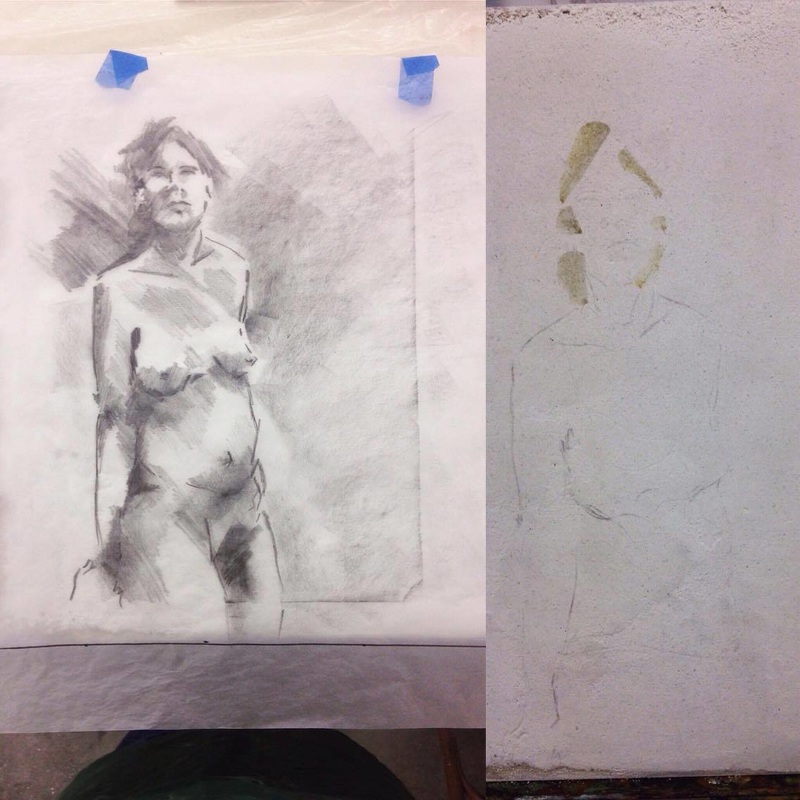 Michelangelo used the technique we will try which is pushing pin holes into the drawing to then pound gently a charcoal powder…leaving the charcoal line on the fresco surface. This is called “spolvero” or “pouncing.” 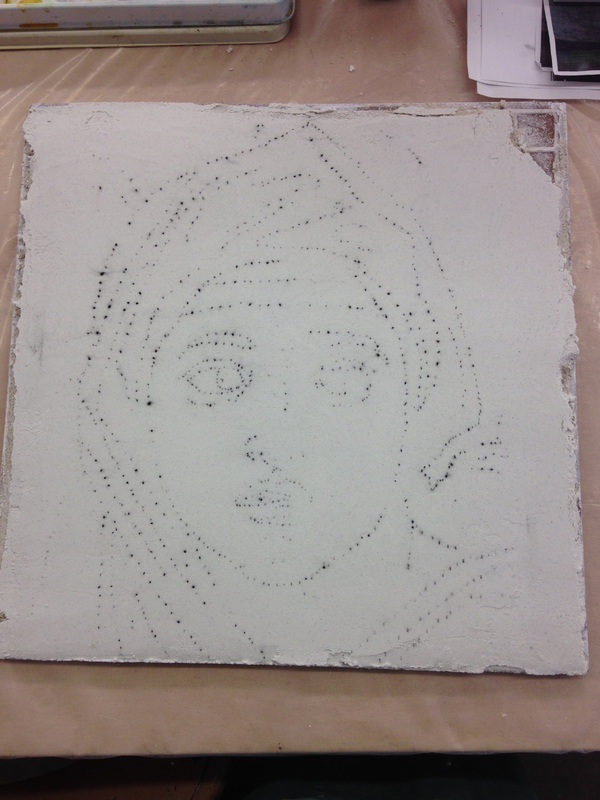 |
Hi I'm Stephanie! On my blog you can read about my research, process, techniques, and other ideas and inspirations. Feel free to contact me with any questions or comments!
Categories
All
|
 RSS Feed